
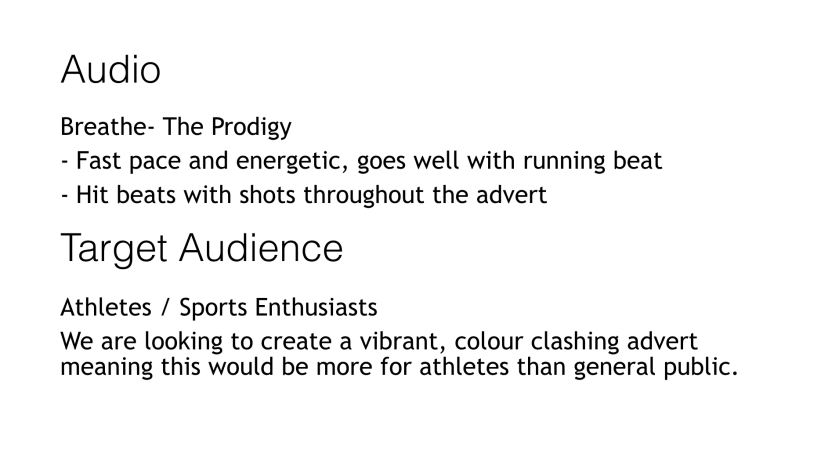
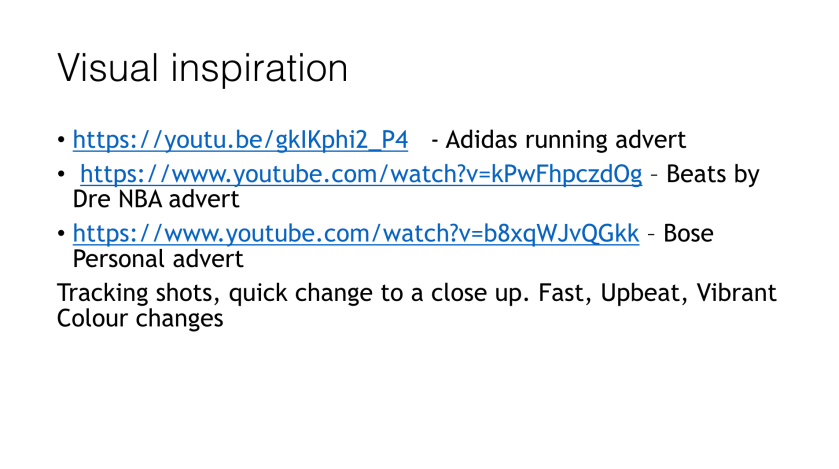
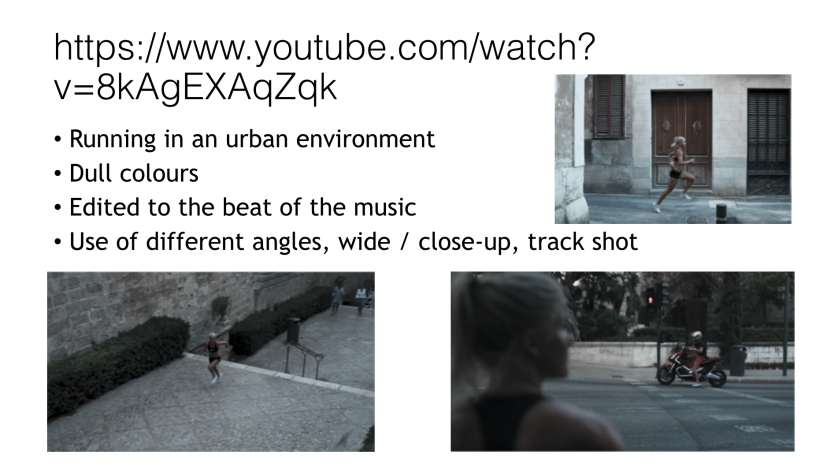
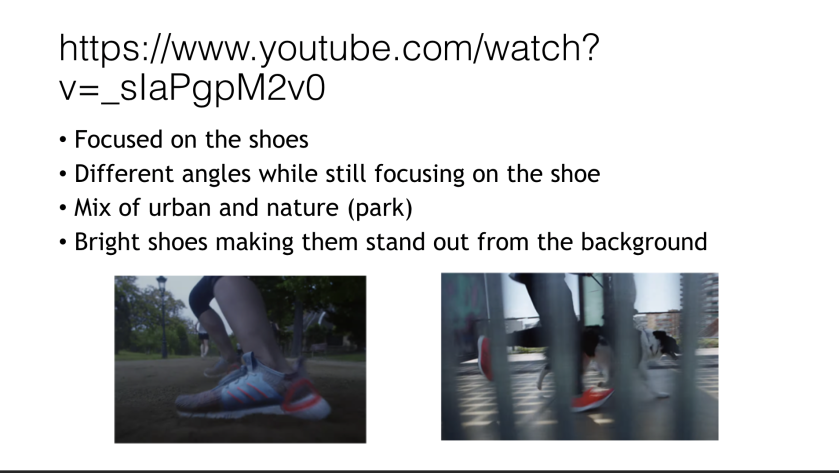
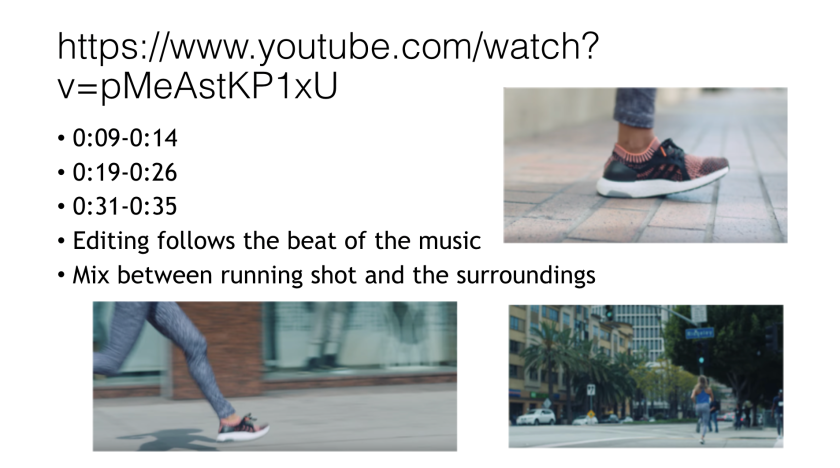
sport shoe advert- introduction to treatment
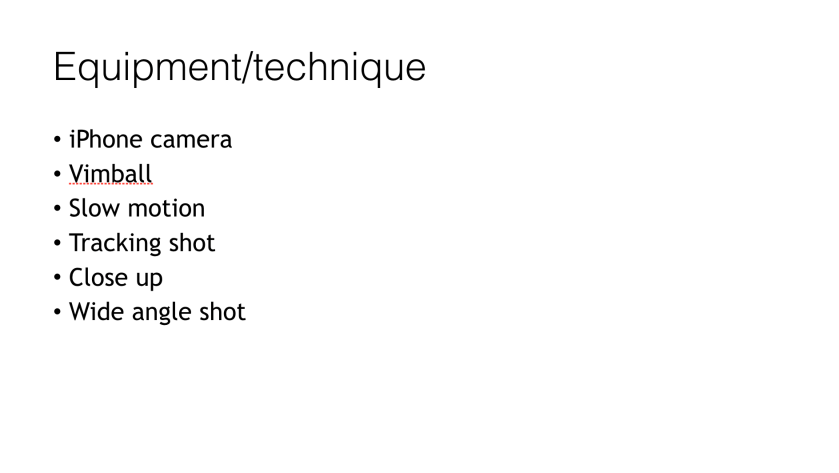
Moving Image, Moving Image research, Year 2During this workshop with photographer and film maker Vivek Vadoliya we was asked to create a 45 second advert promoting a sports trainer. The task was designed to help us gain an understanding of how to use a treatment to make creating a piece of work easier for the photographer/filmmaker as well as the client to gain a visual understanding of the layout out of the video. Creating a treatment involves creating a mood board, shot list, narrative, audio, colour pallet and visual inspiration. By planning all of these elements, makes the creation of the video a lot easier. Treatments are a useful way of pitching to clients to give them a clear understanding in what you are trying to achieve.
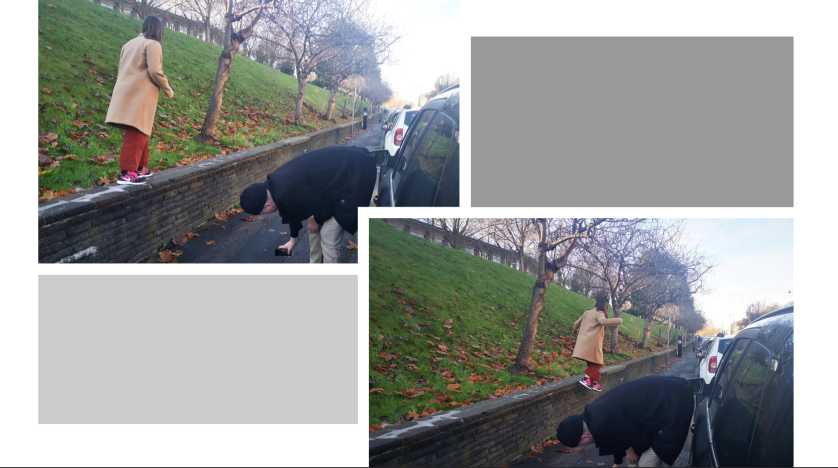
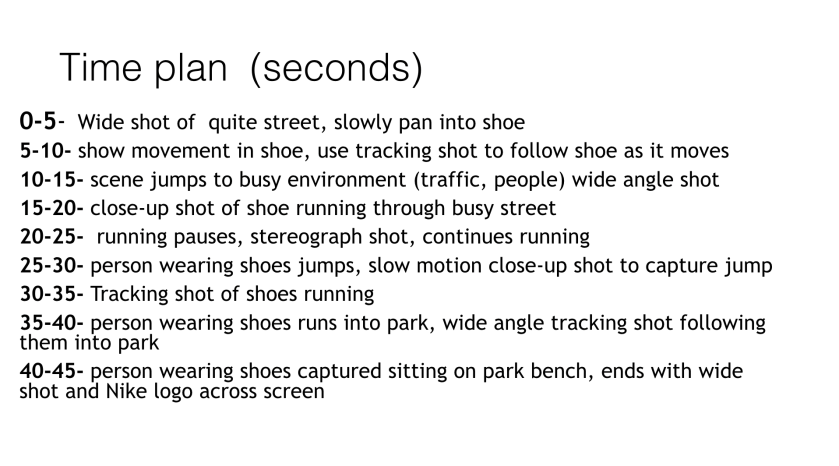
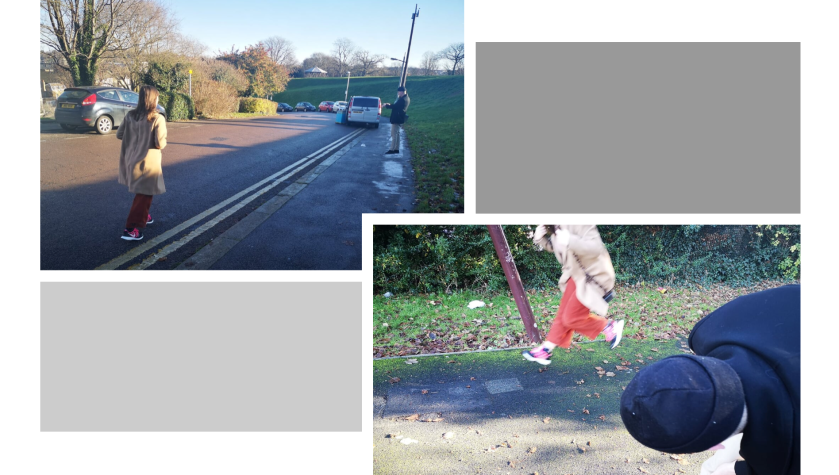
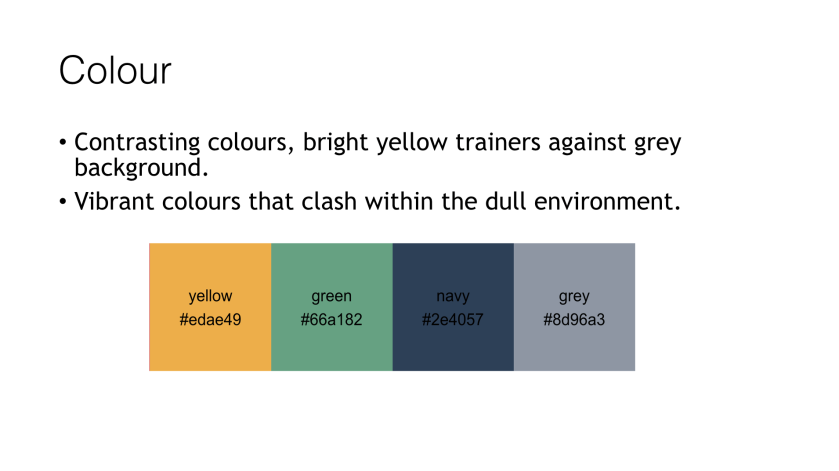
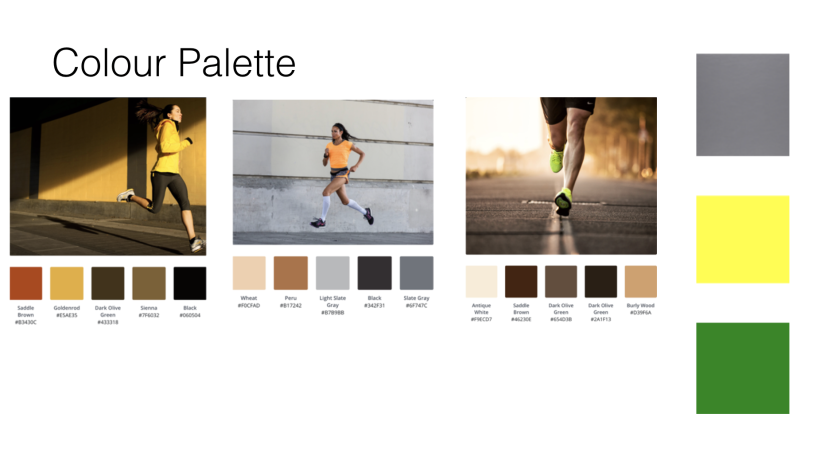
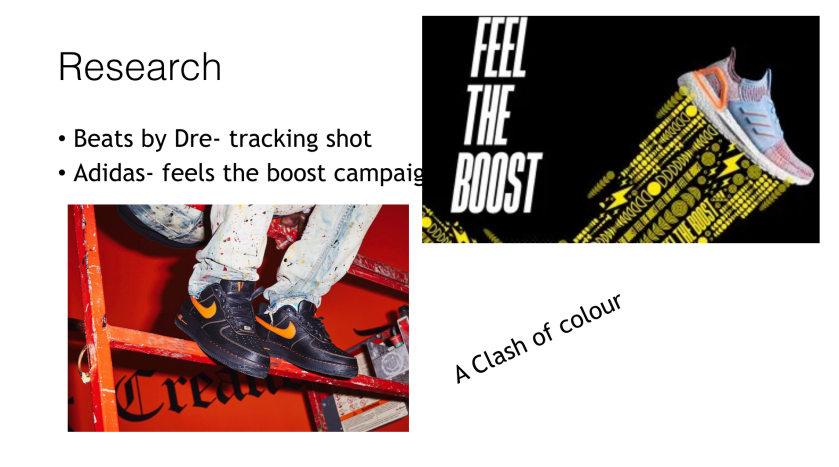
Prior to shooting the advert, me and my group made a treatment plan looking into how we are going to approach the video. Having a shot list really helped us stick to a theme, it kept filming relevant to the brief we created. Our focus was to create an advert that would advertise nike trainers for everyday commuters. We used brightly coloured trainers to make the shoes stand out amongst the dull urban background. The idea was to create a fast paced trainer advert and I think we portrayed the idea well. Overall I am happy with the end result of the film. It was good practice creating a treatment as I am going to use a treatment to plan my own video. I really enjoyed making the advert and my the group that I was in worked really well together as a team.
Fatboy Slim- Praise You
Moving Image, Moving Image research, Year 2This iconic fat boy slim video was directed by Matt Schoolgirls accompanied by Brian Teyssier. The song and video were released in 1999 and featured Spike Jonze performing with The Torrance Community Dance Group. The performance was set in a cinema in Los Angeles. The music video was a break through dance video and was nominated for several awards including best break through music video. The whole music video is shot in guerrilla style, which means the video used minimal props and was created on a very low budget of only $800.
I have chosen to look at this particular video because of its simple nature, a video like this could be relatively easy to produce in the time frame and budget I have for this moving image unit. The video is shot in one single take on a simple home video camcorder. The video has such a simple concept but is so effective in providing entertainment for the audience, it’s the kind of music video people want to watch over and over again. The Praise you video was a revelation to the music video industry and has become one of the most influential dance videos of all time. This music video shows the world that you do not need a big budget to create something great.
There is elements of this video, that I am going to use as inspiration for my own production. The fact that I do not need to use a top of the range camera to create a good video. This video has pushed me to develop a strong concept for my music video. A concept that can be represented through guerrilla style production. I would like to incorporate some kind of dance or emphasised movement in my music video. The art of film making sits hand in hand with the art of performance, whether that be through dance or music.
The verve- Bitter Sweet Symphony
Moving Image, Moving Image research, Year 2The Verve’s Bitter Sweet Symphony music video is one for the industry’s simpler styles of music video the director Walter A. Stern is a well known music video director. Stern has worked with many musicians over the years some of which include; Madonna, David Bowie, Bloc Party and Nine Inch Nails. Stern first came to fame when he directed the promo for a band called The Prodigy. Walter Stern continued to collaborate with The Prodigy and directed some of their most well known songs ‘Firestarter’ and ‘breathe’ in 1993. This particular music video caught my eye because it gives me a reachable goal for my own music video.
Even though this video for the Verve is one of music’s most iconic videos its not shot using a great deal of props or special effects. The video just uses one tracking shot of Richard Ashcroft walking down an average street, while mouthing the lyrics from the song. I feel that this style of music video is achievable in the time that I had to complete this project. I chose to look at this particular music video because I was draw to the use of camera technique. This style of tracking shot keeps the audience engaged, its appears that the audience is walking with the singer on his way down the street. Tracking shots allow the audience to feel as if they are moving with the actors as they make their way through a scene. For my own music video, I plan to demonstrate a similar kind of tracking shot as the one Walter A. Stern uses in the Verve’s music video.
IICON stage- Glastonbury 2019
Moving Image, Moving Image research, Year 2Over the summer I had the amazing opportunity to work as a photographer at Glastonbury working for clients such as; the BBC, Sliver Hayes, Glastonbury on sea and Block 9. During my time at Glastonbury I spent most of my time with Block 9 working with them on their amazing IICON Stage. I have chosen to look at the IICON stage as inspiration for this moving image because of the visuals that went into the stage. The stage featured a 20-foot head with the stage being located in the middle of the eyes. The IIcon stage is the first of its kind. The team behind Icon have been working on the project for 11 years. The stage displays incredible visual video footage. By using advanced laser mapping technology, images are projected in 3D onto the stage itself.
I am not expecting to create a piece of moving image anywhere near as advanced as the one used on the IICON stage; however, I want to use the visual effects as inspiration for my moving image piece. The way the images being projected onto the stage complemented the background music was extraordinary. For my moving image piece, I hope to create a music video, so looking to the IICON stage of inspiration is a good way to get my project started. The images where created by several artists and photographers such as my uncle Martin Perry. The footage included dancers, human form, nature and the audience themselves.
It was important that the choice of music went perfectly with the images being used. This is an important lesson when creating any kind of video to music. In order to make a successful video the music and imagery must harmonise perfectly. The images for the stage were created both in a studio and in the outside environment. By mixing all the video elements together.

Cinematic Camera Techniques
Moving Image, Moving Image research, Year 2The close up– The close up shot is one for cinemas most well known camera techniques. The close up shot is used to show the details in the scene. The close up is designed to show the audience certain details in the scene that otherwise would be missed. Close up camera angles can be used to show the emotions in the actors face. As scene in Martin Scorsese’s Mean Streets 1973. Scorsese uses a sequence of close up camera angles to show the actors intoxicated state. By strapping the camera to the actor himself Scorsese has captured the emotions and the moment of the actor, making us as the audience feel like we are in the mans state of mind. Close up’s direct the audience to important details within the scene.

Tracking– Tracking is a specialist camera technique seen in many films. Tracking allows the audience to make sense of chaotic scenes. The camera says fixed on the actor while they move through the scene. A great example of tracking is Max Ophuls’s The Earrings of Madame De made in 1953. Ophuls was one of the first film makers to use the tracking shot. The camera follows the actress as she walks around her bedroom, the camera follows her, showing the audience only what the actress is looking at herself. The whole scene was shot in one take. The camera flows beautifully through the scene following the actress through the room. Even though the scene is busy, tracking allows us as the viewer to maintain a sense of order.

Slow Motion– Slow Motion is an effect used by many film makers. By using slow motion a director can emphasise detail in the scene that would otherwise be missed by the viewer. A great example of slow motion used in cinema is Wong Kar-Wai’s ‘In the mood for love’ One of the scenes in the movie is shot completely in slow motion. This makes the audience pick up tiny details in the scene that Kar-wai wanted us to see. The way the costume the actors are wearing flow though the scene adds a seductive quality to the scene. The cleaver technique elevates what would be an ordinary scene during the film.

Time Lapse– Time lapse is a camera technique used to show the passing of time with in a scene. A good example of time lapse used within the film industry is George Pal’s The Time Machine made in 1960. During a scene where the actor is seen in his time machine, a manikin is used to show the passing of time as he moves throughout the years. Time lapse is used to show the gradual changes to the models outfit as time moves on. Each time the outfit is changed a quick photograph would be taken, this is repeated over and over until it appears the model is changing clothes at a constant rate. the use of time lapse helps the audience to understand the changes in time zone.

Stillness– Stillness is a popular camera technique often used to introduce a character or point out important detail within the film. A great example of stillness is Danny Boyle’s Trainspotting. Stillness is used at the very start of the movie to introduce the characters one by one to the audience. Each still shot brings out a part of the characters personality to the audience, helping them to connect and build a relationship to the characters. Stillness is a good way to profile each character so the audience can familiarise themselves with each character in the film.

Focus– Focus is a technique to draw the audiences eye to a certain element of the screen, focused is used to make the audience look at a certain part of the scene. Focus is a useful tool because it helps directed the viewer to connected with the right part of the scene at the right time. Without focus the audience could become confused or distracted by the background activity. An example of focus is in the film ‘Young Victoria’ by Jean-Marc vallee. The scene where Victoria is seen sitting in a banquet hall uses a great amount of focus. The focus really helps the audience make scene of the crowed space and follow the story.

Frames in Frames– Framing is a very important part of making a good movie. Framing can be used to portray symbolic meaning in movie scenes. An iconic use of good framing is Wim Wenders ‘Paris Texas’ made in 1984. In this scene shown below, the actors are communicating through a one way glass. The male actor plays an abusive husband talking and watching his wife through a mirrored window. This still shot shows the characters relationship, the abusive husband has consumed his wife and taken over her mind and body. This scene is a great metaphor for the relation the characters have, acting as a meaningful symbol of what is to come in the movie.

Evaluation- Photo Object
Object and Body, Objects In Time, Photo Object, Photography As Object, Still Life, Year 2For this photo object unit I chose to specialise in photography as object. Over the past four weeks I have investigated Still Life, Object and Body, Photography as an object and objects in time. Out of these four mini units I decide to specialise in photography as an object. I felt this subject related the most to my previous work as I come from an art and design background. Over the pass few weeks I have created a body of work relating all of the topics, the weekly workshops for each of the units I found really useful. This unit has given me the opportunity to work within different photographic environments to create work in a professional environment.
I have found this unit a good opportunity to get back into to my course after the summer break. By having such a short unit with a close deadline helped me get back into the swing of working. This project I felt had its positives and negatives, the project’s positives were it gave me a chance to familiarise myself with working in studios again and using the university’s equipment and softwhere. The downside of this project was, I didn’t feel the work I produced was to the best of my ability. I could have had more attechion to detail in my the development and making of my final collages. This project was not my strong point as I work more as a documentary and portrait style of photographer, however I am open to new ways of creating work.
Overall I am happy with the work I have produced for this unit, even though I do not feel it is the best of my abilities, I have put a lot of time had effort into this project to create the work I did. I am really looking forward to the next unit which is moving image. I have never worked with video before so I am looking forward to working with a new media. Learning from this photo object unit I am going to produce more test shoots and trails before I start to create my final piece. The eight week unit length instead of four should give me the opportunity to research more in depth and produce a higher quality final outcome.
Final piece- Photography as Object
Photo Object, Photography As Object, Year 2For my final piece for this unit I chose to submit 3 collages looking how beauty can be manipulated. I wanted the images that I submitted to be brightly coloured and stand out to the audience. To create these set of collages I combined a number of different mediums to form the final image. I used a studio to take some basic portraits of a model, I wanted the portraits to be plain because I knew I was later going to manipulate them within my collages. Once I was happy with the portraits, I printed them off and began to cut them out. I took my time rearranging the portraits until I was happy with the ones I wanted to use.
For the next stage I bought a few magazines and newspapers and started to cut out elements from the newspaper that I would consider using for my collage. The idea was to match other models faces to my own model I used in the studio. The idea behind the making these collages was to alter the perception of beauty. It was the idea of two objects of beauty not always having a beautiful outcome. After looking at a number of different collage artists I decided I wanted to experiment with the way I attached the elements of my collage together. I experimented with things such as; string, glue, staples and thread. I wanted to investigate how different materials would look when added to the collage. I originally chose a plain background for the images however I thought this looked bare.
I wanted the portraits to have a background that complemented my theme. In the end I decided I wanted flowers as the background. Flowers seemed like the right choice for the collage background because they acted both as a juxtaposition towards the manipulated portraits and as a metaphor for beauty. I got the flowers from various gardening magazines, I chose roses because roses are seen as an immediate sign of beauty. After placing the flowers behind my existing collages. I took my collages to a group critique session at university and my peers suggested I added a different colour background and maybe some text relating to my collage. I took these points on bored and added coloured background to all three of my collages. I chose feminine colours such as; pink, yellow and orange for the background as it relates to my theme of beauty.
The final stage of creating my collages was to add text as my colleges had suggested. I chose words that related to my theme and to each individual collage. I wanted words that signified different ideas of beauty throughout femininity. I used news paper cut outs to create the words on my collages. The reason I used letters from the newspaper is because the media is where women are often objectified the most, I chose The Sun newspaper as it is know for its ‘page three’ style articles. Overall the creation of my collages has been an enjoyable experience. Collage is a medium I do not have a lot of experience in so I wanted to push myself to try something different. I am happy with the end result however I feel I could have pushed myself more in terms of the final appearance of the collage.


History of Collage- Photography as Object
Photo Object, Photography As Object, Year 2Collage was first introduced by cuban artists in the 20th century. The cuban movement was introduced by painters such as Pablo Picasso and Georges Braque. However early developments of collage can be seen throughout Chinese history around 200bc when the invention of paper came about. Collage wasn’t recognised as an art until the 20th century, but we can find evidence of collage during medieval times using materials such as gold leaf and metals. It can be argued that Pablo Picasso and Georges Braque were the true inventors of the collage movement.


Both Picasso and Braque demonstrated collage techniques in there !9th century oil paintings. It can be argued the Braque was in fact the one to start the collage movement, by matching pieces of oak wall paper to his charcoal drawings. Soon after Braque’s experimentation Picasso began to experiment with the medium himself. Collage soon became a discipline that many artist experimented with. Artists such as Kurt Schwitters started playing around with using different materials to create collages. Schwitters became responsible for the invention of wood collage. Wood collage would involve the artists painting and adding different materials to wood, creating colourful and abstract pieces of art work. Collage artist Louise Nevelson to the medium further, finding scraps and gluing them to pieces to wood canvas she had created.


The collage medium was then taken over by the photomontage era. Collage really took off during the late 20th century with collage artists such as Richard Hamilton taking the art world by storm by creating collages such as ‘just what is it that makes today’s homes so different, so appealing?’ This famous collage by Hamilton featured a classic take on a 1950’s home completely made of collage. Hamilton created the collage by using magazine cut outs he found at the time. Collage is a medium that has been used throughout the years in many important and influential pieces of work. Collage was often used during the first and second world wars to send messages to civilians, persuading them to join the war effort. Collage has become such a big part of the art world, its celebrated throughout many cultures and is something I wanted to attempt for my final piece. Collage gives us the ability to manipulate images to send important messages to the audience.


Weegee- Object and body
Object and Body, Photo Object, Year 2Weegee is a very known street photographer, specializing in photographing crimes or emergencies in society. based in new York city, he captured the current issues at the time. I have chosen to research Weegee because his picture “the mannequin”, taken in the 1940’s because it relates to the subject of object and body. This photograph is particularity interesting because the photograph features both a body and a body as an object. Weegee is one of my favorite documentary photographers of all time, his eye for detail in social situations is why he is one of the greatest photographers of all time.
I chose to research Weegee for Object and body because of this photograph of a man carrying a mannequin. The Photo could have a number of different meanings relating to object and body. The object in the photograph being a female mannequin, could portray the objectifying attitude men had towards women at the time this photograph was take. The female gender at the time would have been largly viewed as objects rater then human beings during the 1940’s, to please their husbands and bring up the children at home, so its ironic that the photograph taken by Weegee the female is in fact the only object in the photograph, surrounding by a group of men.
By adding relevant objects into photographs can portray meaning into photographs. By using objects that relate to the body that is being photographed can be a useful tool when creating meaningful pieces of artwork. I will consider using objects that relate to my subject in future shoots. This could relate to my final piece for this unit because I am making the body an object within my collage work.

